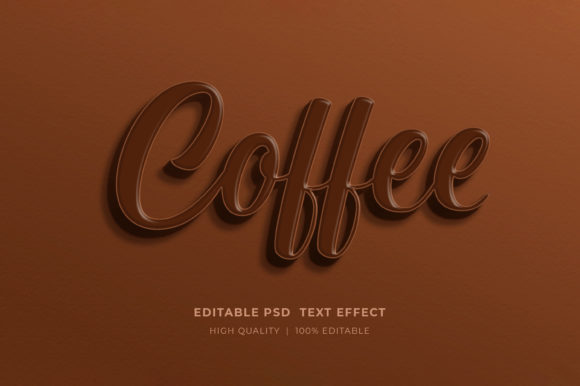
Mastering the Coffee 3D Text Effect PSD Mockup for Professional Designs
In the fast-paced world of digital design, first impressions are everything. Whether you are crafting a logo presentation for a new coffee shop, designing a book cover for a culinary memoir, or creating eye-catching social media banners, the quality of your typography can make or break the project. This is where a Coffee 3D Text Effect PSD Mockup becomes an invaluable asset. These editable resources allow creators to apply realistic, three-dimensional textures and lighting to their text without needing advanced modeling skills. However, simply downloading a file is not enough. Many designers, from beginners to seasoned professionals, often overlook critical steps in selection and execution, leading to lackluster results that fail to communicate their intended message effectively.
The primary appeal of an editable 3D text style effect mockup lies in its efficiency. Instead of spending hours rendering light rays, steam effects, and bean textures in a 3D environment, you can achieve a similar high-end look in minutes. The workflow is designed to be intuitive: you double-click on the smart object layer, a new tab opens, you select the type tool, click the existing text, and input your desired wording. Yet, this simplicity often breeds complacency. A common mistake is assuming that any font will work seamlessly with these specific effects. Coffee-themed mockups often rely on bold, rounded, or rustic typefaces to mimic the organic nature of coffee beans and the fluidity of liquid. Using a thin, geometric sans-serif font might result in the texture getting lost or the 3D extrusion looking unnatural. Before you begin typing, always check the recommended font links provided in the help file. If you must use a different font, ensure it has enough weight to carry the 3D effect convincingly.
Avoiding Resolution and Color Mode Pitfalls
One of the most frequent errors occurs when designers ignore the technical specifications of the source file, specifically regarding resolution and color mode. High-quality mockups are typically delivered in RGB color at high resolutions to ensure crisp details on screens. However, if your final output is intended for print—such as flyers, posters, or T-shirt designs for POD (Print on Demand) services—you must be cautious. While many modern printers accept RGB files, professional offset printing often requires CMYK. Converting a complex 3D mockup from RGB to CMYK after editing can sometimes shift the rich browns and warm golds of the coffee theme into muddy, dull tones.
To avoid this, check the file requirements early. If you are creating marketing materials for web banners, Facebook timelines, or website elements, sticking to the native RGB format is perfectly fine and often preferred for vibrancy. But for physical products like KDP book covers or merchandise, verify if the mockup supports CMYK conversion or if you need to adjust your color expectations. Furthermore, never scale a smart object up beyond its original size. Doing so forces Photoshop to interpolate pixels, resulting in a blurry, pixelated finish that ruins the illusion of realism. Always start with a canvas size that meets or exceeds your final output dimensions.
Organization and Layer Management
Another area where efficiency is often lost is in layer management. A well-organized PSD file is a hallmark of a professional resource, featuring clearly named groups for shadows, highlights, background elements, and the smart object itself. Beginners sometimes make the mistake of flattening layers prematurely to "simplify" the file. This is a irreversible error that strips away your ability to tweak lighting intensity, change background colors, or adjust the angle of the text later. Keep the layers intact until your very final export.
Additionally, pay attention to the lighting consistency within the scene. A coffee 3D text effect usually implies a specific light source, perhaps mimicking morning sun or warm cafe lighting. If you insert a logo or icon that has its own conflicting shadow direction, the composite will look fake. When adding icons or logos alongside your text, ensure they are integrated into the same smart object or that their lighting matches the environment. The goal is cohesion; the text should look like it physically exists in the space, casting appropriate shadows on the surface below.
Practical Steps for Flawless Execution
To get the most out of your download, follow a disciplined workflow. First, remember that these files usually come in a compressed zipped format. You cannot edit the content directly inside the zip folder. You must right-click the folder and select "Extract Here" to access the working Adobe Photoshop files. Skipping this step often leads to error messages stating the file is read-only or corrupted.
Once extracted and opened in Photoshop, locate the layer marked as the Smart Object. Double-click the thumbnail icon, not just the name. This action opens a separate document window (.psb file). Here, you can replace the placeholder text with your brand name or slogan. It is crucial to save this smart object file (Ctrl+S or Cmd+S) to update the main mockup. Many users forget this specific save action, wondering why their changes aren't reflecting in the main view.
- Check Font Licensing: If the mockup includes a specific font, ensure you have the license to use it for your specific project, especially for commercial client work.
- Test Different Backgrounds: While the default coffee bean background is attractive, don't be afraid to hide that layer and test your text against solid colors or blurred cafe interiors to see what fits your brand best.
- Export Correctly: For web use, export as PNG for transparency or high-quality JPG. For print, TIFF or PDF is usually safer to preserve layer data if further adjustments are needed by a printer.
Maximizing Versatility Across Projects
The utility of a Coffee 3D Text Effect PSD Mockup extends far beyond just coffee shops. Entrepreneurs can use these warm, inviting textures for bakery logos, bookstore branding, or even autumn-themed sales banners. The key is to recognize the emotional resonance of the aesthetic. The rich browns and steaming effects evoke feelings of comfort, warmth, and energy. Applying this to a tech startup's logo might send the wrong message, but for a lifestyle blog, a fitness coach promoting morning routines, or a holiday greeting card, it is perfect.
When using these effects for T-shirt designs or POD products, keep in mind the limitations of the printing medium. Intricate 3D gradients might not translate well onto certain fabric types like heather grey cotton. In such cases, simplify the design within the smart object by reducing the complexity of the texture overlays before exporting. Always order a sample if possible, or at least visualize the design on a mockup of the actual garment to ensure readability.
Finally, do not hesitate to seek support if you encounter technical hurdles. Most creators of these high-quality resources provide help files and contact options through their profile pages. If a font link is broken or a smart object behaves unexpectedly, reaching out can save you hours of frustration. Moreover, leaving constructive feedback or rating the design helps the community grow and encourages designers to create more specialized tools. By approaching these resources with a mindset of careful evaluation and technical precision, you transform a simple template into a powerful component of your visual identity, ensuring your projects stand out with professionalism and polish.